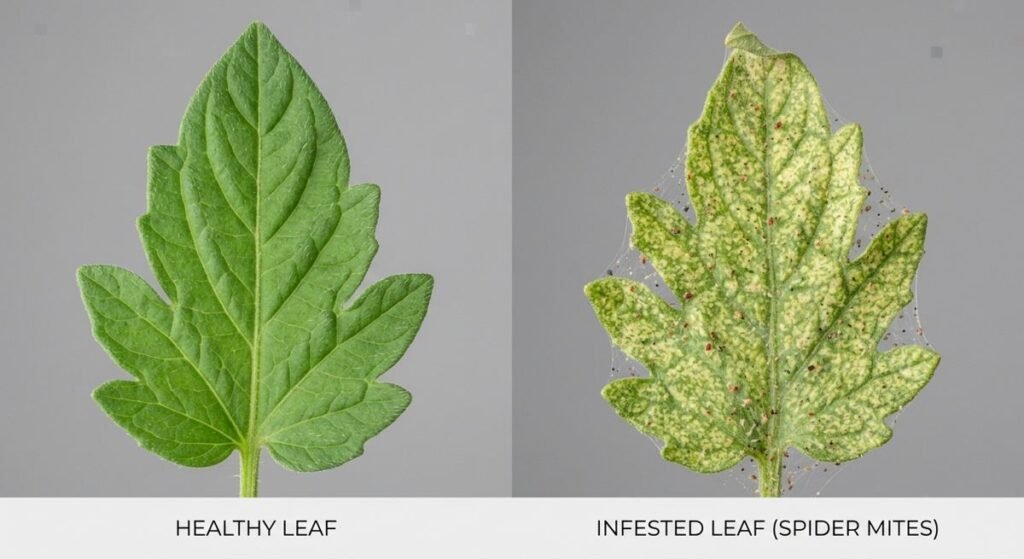
Spider mites are one of the most common — and most commonly missed — indoor plant pests, largely because they’re barely visible to the naked eye until a population has already grown large enough to cause real damage. By the time most people notice something’s wrong, the infestation is often well established, which makes early identification especially valuable.
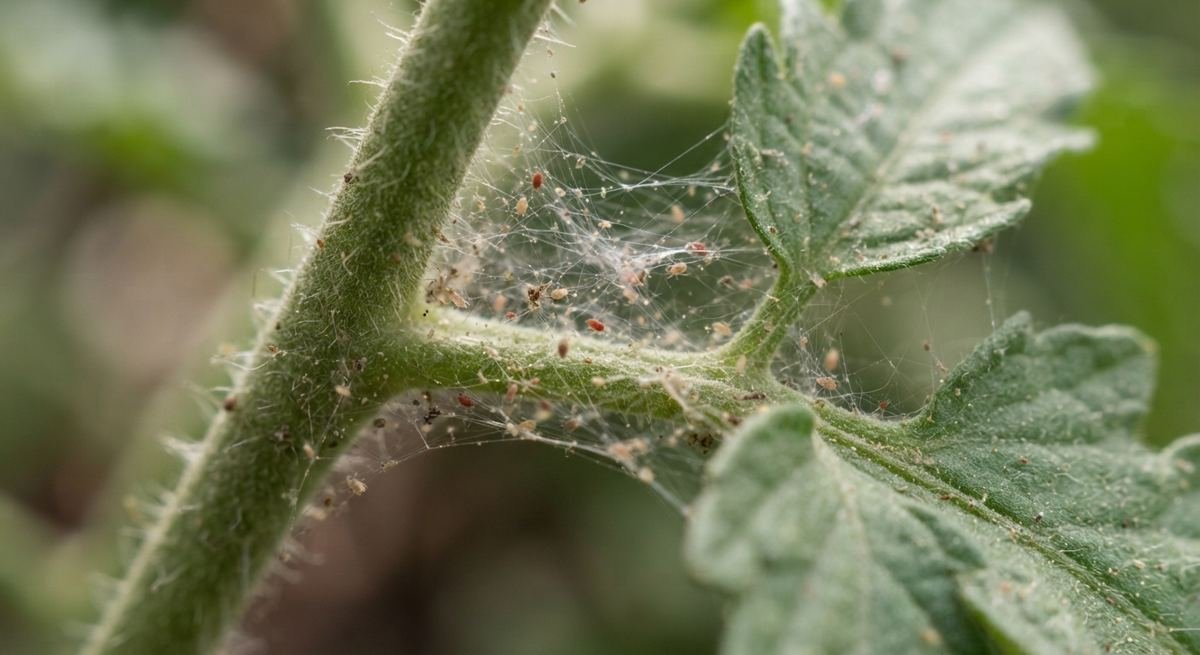
How to Identify Spider Mites
Spider mites aren’t insects but tiny arachnids, related to spiders and ticks, typically less than 1/50 inch long — genuinely difficult to see without magnification, appearing as tiny moving dots, often red, brown, or yellowish-green depending on species.
Key signs of spider mites, roughly in order of how early they appear:
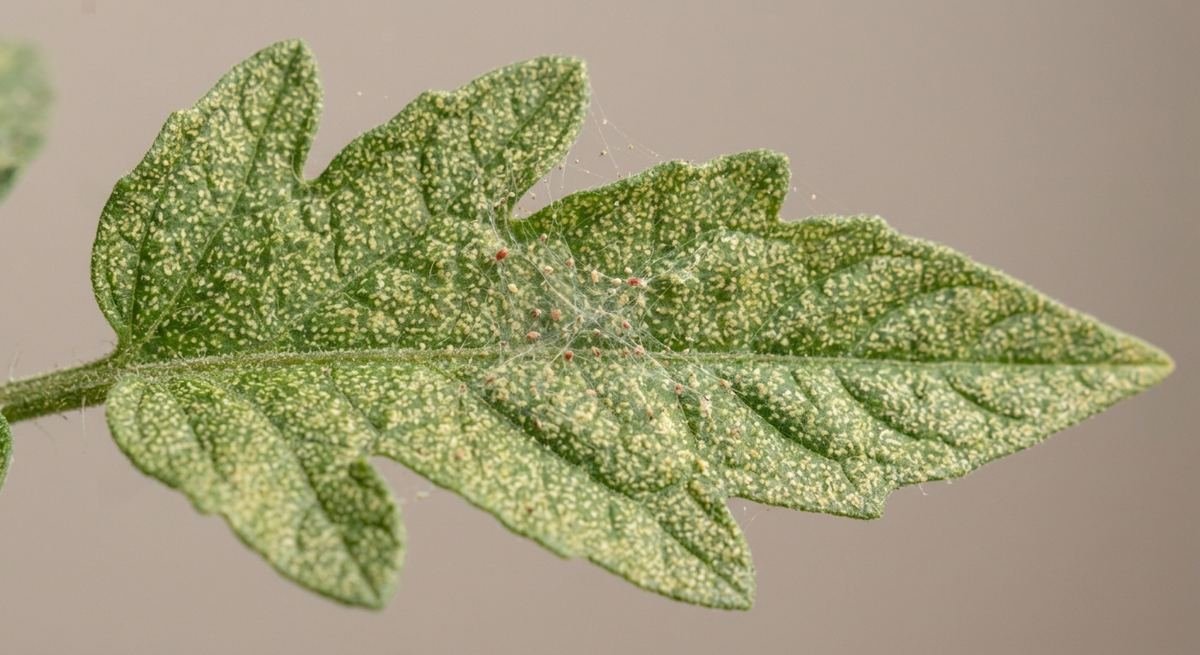
Fine stippling or speckling on leaves is usually the first visible sign — tiny pale yellow or white dots scattered across the leaf surface where mites have pierced plant cells to feed. This is often mistaken for a nutrient deficiency or general leaf discoloration before anyone thinks to check for pests.
Fine webbing, particularly around leaf joints, along stems, and on the undersides of leaves, becomes visible as the infestation progresses. This webbing is the clearest, most distinctive confirmation of spider mites specifically, since few other common houseplant pests produce it.
Bronze or dull, dusty-looking leaves develop as stippling becomes severe enough to affect the leaf’s overall appearance and its capacity for photosynthesis.
Leaf drop and overall decline occur in advanced infestations, as the cumulative feeding damage overwhelms the plant’s ability to recover.
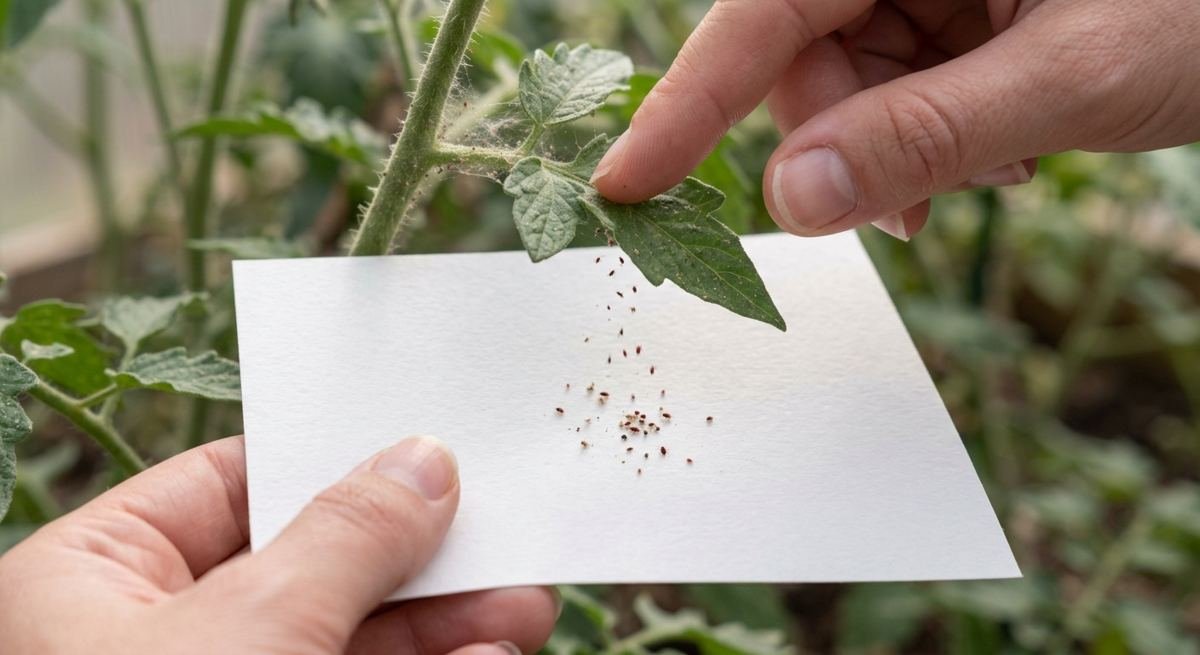
The Simple Paper Test
If you suspect spider mites but can’t see them clearly, hold plain white paper under a leaf and gently tap the foliage. Moving specks can help you detect mites; use a hand lens and check for stippling and fine webbing before deciding on treatment.
Why Spider Mites Thrive Indoors
Spider mites favor warm, dry conditions, which describes the average heated home through fall and winter almost perfectly — indoor air, especially with heating running, often has considerably lower humidity than these mites’ natural outdoor environment, but low humidity is exactly what allows their populations to explode. This is part of why spider mite problems often become noticeably worse specifically during the dry winter months.
How to Treat Spider Mites
1. Isolate the affected plant immediately
Spider mites spread easily to nearby plants, whether by direct contact between touching leaves or by simply crawling or being carried on air currents. Moving an infested plant away from others as soon as you suspect a problem prevents the infestation from spreading while you treat it.
2. Rinse the plant thoroughly
A strong spray of water, focusing on the undersides of leaves where mites concentrate, physically knocks off a significant portion of the population and disrupts their webbing. This works well as a first response and as an ongoing part of treatment, repeated every few days.
3. Apply insecticidal soap or neem oil
Insecticidal soaps and horticultural oils, including labeled neem-oil products, can control mites they contact. Cover both leaf surfaces, especially the undersides. Choose a product labeled for spider mites, indoor use, and your plant; test a small area first and follow its directions for dilution and repeat applications. Eggs may survive, so keep inspecting and repeat only at the label’s interval.
4. Consider a miticide for severe infestations
For infestations that don’t respond to soap or neem oil after a couple of treatment cycles, a product specifically formulated as a miticide (rather than a general insecticide, since standard insecticides are often ineffective against mites specifically) may be necessary. Always follow label instructions carefully and check that it’s labeled safe for the specific plant.
5. Increase humidity around the plant
Since spider mites favor dry conditions, maintaining humidity appropriate for the plant can support recovery. A humidifier is more reliable than a pebble tray. Keep the infested plant isolated rather than grouping it with healthy plants, and treat humidity as a complement to direct control.
6. Repeat treatment consistently
A single treatment often misses eggs or hidden mites. Recheck leaf undersides and new growth regularly and repeat applications at the interval allowed on the product label. Continue monitoring after symptoms improve rather than assuming one spray has resolved the infestation.
Preventing Spider Mites
Maintain reasonable humidity, particularly for humidity-loving plants during dry winter months, since low humidity is one of the biggest contributing factors to mite population explosions.
Inspect new plants carefully before placing them near your existing collection, since spider mites are commonly introduced on plants that already carried a low-level, easy-to-miss infestation.
Regularly rinse or wipe down leaves, especially for plants prone to dust accumulation, since this both physically removes early mite populations and makes it easier to spot problems while they’re still minor.
Avoid excessive heat and dryness directly around plants, such as placement right next to a heating vent, which creates exactly the warm, dry conditions mites favor most.
The Bottom Line
Spider mites are easy to miss until an infestation is well underway. Regular inspection, magnification, and the white-paper test help with detection. Once identified, isolate the plant, rinse away mites, and use a labeled insecticidal soap or horticultural oil if needed. Repeat according to the label and maintain suitable humidity while the plant recovers.
Related Indoor Plant Guides
Further reading: University of Minnesota Extension: twospotted spider mites.
Last modified: October 19, 2026